Views: 0 Author: Site Editor Publish Time: 2025-09-15 Origin: Site
To achieve excellent results in flexo printing, you need to follow a clear step-by-step guide when setting up your machine. Each step in the process—from substrate handling to ink management—matters for both efficiency and print quality. Advances in technology, like improved plate imaging and automated controls, have made it easier to maintain precise alignment and reduce waste. Careful attention to each part of the flexo printing machine setup helps you avoid errors and produce high-quality prints. Trusted brands like Henghao support you in mastering these steps to flexo printing, making setting up your machine straightforward and reliable.
Clean and prepare substrates carefully to avoid print defects and ensure consistent quality.
Mount printing plates precisely using clean surfaces and proper registration to prevent blurry images.
Mix inks correctly by matching them to substrates and controlling viscosity for sharp, vibrant prints.
Calibrate machine settings like impression pressure and tension regularly to maintain print accuracy.
Monitor print quality continuously and perform routine cleaning and maintenance to extend machine life.
You must begin every flexo printing job with careful substrate preparation. Clean substrates help you avoid print defects and ensure consistent quality. Dust, dirt, fibers, and static-attracted particles often settle on substrates in industrial environments. These contaminants can cause smudges, spots, and muddy colors on your prints. You may see streaks or uneven ink coverage if you skip this step.
To prepare the substrate, follow these steps:
Inspect the substrate for visible dust, lint, or particles.
Use anti-static devices and web cleaners to remove contaminants before you load the substrate into the flexo printing machine.
Clean printing plates, cylinders, and sleeves to remove ink, grease, and grime.
Check for physical damage such as cuts or indentations.
Make sure idle rollers rotate smoothly for accurate ink transfer.
Tip: Regular cleaning of anilox rollers and ink chambers helps maintain even ink flow and reduces defects.
Proper substrate preparation ensures you load the substrate with minimal risk of print issues. Henghao’s expertise in machine setup supports you in achieving the highest standards for substrate cleanliness and alignment.
A well-organized work area sets the foundation for successful flexo printing. You need to prepare adequate space according to your floor plan. Install utilities such as power, water, and compressed air before your equipment arrives. The floor must support the press and control vibration.
Use this checklist to set up your work area:
Confirm utility readiness and optimal press placement with your team and the equipment supplier.
Schedule installation crews with mechanical and electrical technicians for proper alignment and startup.
Document press setup parameters, including inks, anilox sleeves, and mounting tapes, for repeatability.
Plan initial print trials to verify alignments and calibrations.
Arrange training programs for operators and maintenance staff.
Henghao provides guidance and support throughout the setup process, helping you meet industry standards and maintain a safe, efficient workspace. Careful work area setup ensures you can load the substrate smoothly and begin printing with confidence.
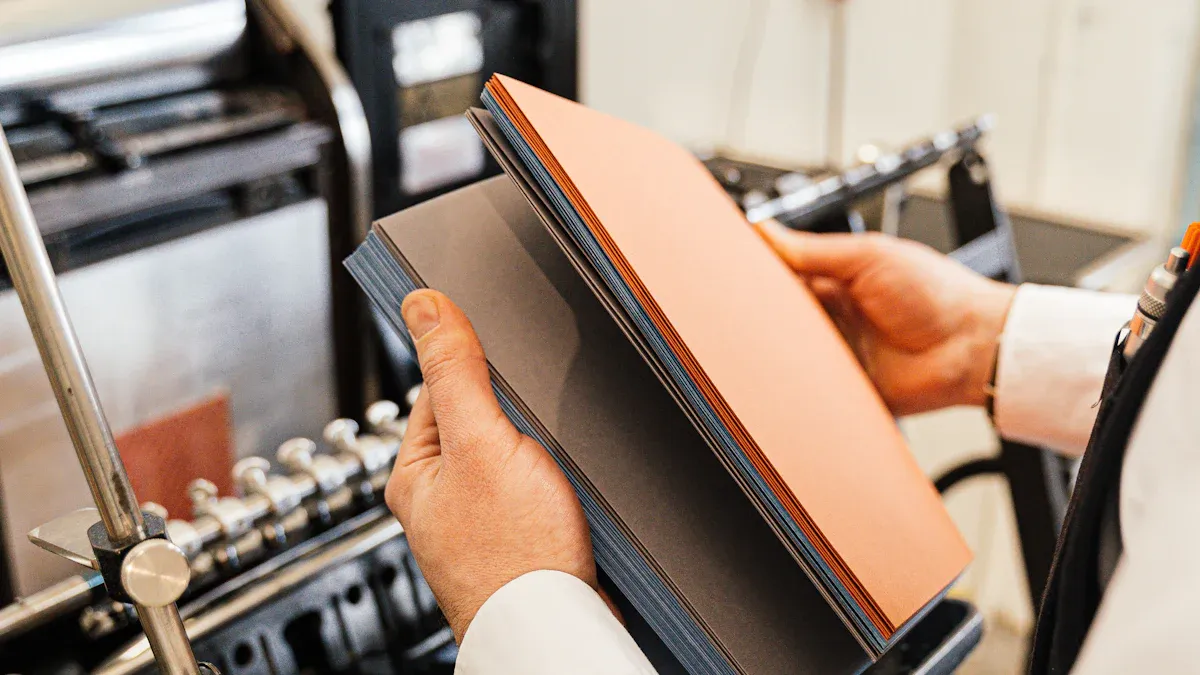
You start the flexographic printing process by creating high-quality plates. In flexographic printing, you use flexible photopolymer plates. These plates wrap around the cylinders of your flexographic printing press and transfer ink to the substrate. Each color in your design needs its own plate. Traditionally, you create plates by exposing photopolymer material to UV light through a film negative. The image areas harden, while the non-image areas remain soft and washable. This process gives you precise and repeatable images, which is essential for packaging and label jobs.
Today, digital platemaking systems automate much of this process. You no longer need film negatives. Instead, you use digital imaging to control resolution, exposure, and plate material. This reduces errors and speeds up plate creation. Digital methods also help you keep the process in-house, so you do not need to outsource plate making. Remember, digital printing is different from flexographic printing. Digital printing does not use plates at all. Instead, it jets ink directly onto the substrate. For flexo, you still need to focus on plate quality and handling.
Tip: Handle plates carefully to avoid scratches or damage, especially on small features. Clean both the plate and cylinder with approved solvents before mounting.
Accurate plate registration is critical for the flexographic printing process. You must align each plate perfectly on the cylinder to ensure that all colors print in the right place. If you mount plates by hand, you risk human error. Misaligned plates cause blurry images and wasted material. Automated mounting systems help you locate registration marks with precision. This reduces setup time and ensures consistent, high-quality prints.
Key steps for successful plate mounting and registration include:
Clean the cylinder and plate thoroughly to prevent adhesion issues.
Apply mounting tape evenly, avoiding overlaps or air pockets.
Use uniform pressure when attaching the plate to the cylinder.
Check registration marks to confirm alignment before starting the press.
You can avoid common problems like plate lift, air pockets, and print defects by following these steps. Henghao’s flexographic printing solutions support you with reliable equipment and guidance for every installation. Proper printing plate installation and registration help you achieve the best results from your flexo press.
You need to mix inks carefully to achieve consistent color and high print quality. Start by checking the type of substrate you will use. Porous materials need different ink formulations than non-porous ones. Adjust the ink composition to match the substrate and the job requirements. Consider the printing speed and temperature, as these factors affect how the ink behaves on the press.
When you mix inks, pay attention to viscosity. If the ink is too thin, details may wash out. If it is too thick, halftone dots can become unclear. Use a viscometer to check viscosity and make manual adjustments as needed. Always mix inks thoroughly to prevent uneven pigment distribution. Store inks in a cool, dry place to avoid degradation. Regularly check ink stability and color before you set the printing parameters.
Tip: Match the ink type to the substrate and pre-treat surfaces if needed to ensure good adhesion and durability.
Here is a table showing key factors that affect ink consistency and color accuracy:
Factor | Impact on Print Quality |
|---|---|
Ink Composition | Affects flow, drying, and color strength |
Substrate Type | Influences ink absorption and sharpness |
Printing Plate Type | Changes ink film thickness and color density |
Press Speed | Alters ink viscosity and color intensity |
Temperature/Humidity | Impacts drying and color consistency |
Henghao offers expert support for ink management, helping you select the right ink presets and settings for every job.
Proper ink chamber loading prevents contamination and waste. Use enclosed chamber doctor blade systems with both metering and containment blades. These blades control ink film thickness and stop leaks. Seal the chamber ends with foam or rubber gaskets to keep ink inside. Deliver ink through a closed loop system to maintain viscosity and protect against evaporation.
Keep the ink level controlled to reduce air bubbles and avoid over-pressurization.
Use dual-blade systems to prevent back doctoring and ensure even ink transfer.
Clean the chamber and blades regularly to avoid ink build-up and color changes.
Choose lightweight, corrosion-resistant chambers for better performance and faster press speeds.
When you ink the printing stations, monitor for leaks and adjust the system as needed. This process helps you achieve higher print quality and color consistency while reducing ink waste. Henghao’s advanced flexo solutions make ink chamber loading efficient and reliable.
You need to calibrate the impression pressure on your flexo printing machine to achieve sharp, consistent prints. Start by performing routine maintenance and optimizing your ci flexo printing press before calibration. Use the same inks and substrates you plan for your production run. Check ink pH, viscosity, and substrate surface tension. Inspect cylinders and sleeves for Total Indicator Runout (TIR) and consistency. Run your flexographic printing machine at actual production speed during calibration. Use clean or new components such as anilox rolls, doctor blades, and stickybacks. Allow your ci flexo printing press to run for at least 15 minutes before recording calibration results. This helps the press stabilize.
Follow these steps for impression pressure calibration:
Conduct a banded anilox trial to select the proper anilox roll for your ink color.
Use fingerprint sleeves or plates with test patterns to evaluate dot gain and ink transfer.
Create a dot gain compensation curve to match printed tone values to your baseline.
Adjust the impression cylinder to control pressure between the printing plate and substrate.
Check lateral and longitudinal register adjustments for accurate image alignment.
Use web guiding to maintain a consistent substrate path.
Proper calibration helps you avoid common errors. Inadequate press setup can cause misregistration and uneven ink distribution. Incorrect ink viscosity leads to smudging and drying problems. Adhesion issues may result in print separation. Excessive anilox volume or wrong ink viscosity can cause dirty prints. Regular maintenance and monitoring keep your ci flexo printing press running smoothly.
Tension adjustment is essential for your central impression flexo printing press. You must keep substrate tension stable to prevent distortion and print defects. Fluctuations in tension can cause creasing, wrinkles, and uneven ink laydown. Use the tension control system on your flexo printing machine to set and monitor substrate tension. Check for vibration and substrate movement, which can lead to missing or light ink areas.
Common calibration errors include improper press setup, anilox roller issues, and substrate tension fluctuations. These problems can cause defects like uneven color, blurred prints, ghosting, double imaging, bridging, skip out, mottled images, pinholing, and dirty prints. You can reduce waste and downtime by maintaining stable tension and cleaning anilox rollers regularly.
Here is a table showing how calibration errors affect print quality:
Defect | Appearance Description | Calibration Error Cause |
|---|---|---|
Misregistration | Color shifting, blurry prints | Plate orientation, tension issues |
Bridging | Letters blend, low-res images | Excessive pressure |
Skip Out | Missing or light ink areas | Vibration, poor cylinder contact |
Mottled Image | Uneven print density | Incorrect anilox cell volume |
Pinholing | Small unprinted spots | Dirty anilox, fast ink drying |
Dirty Print | Messy appearance, ink flecks | Dirt contamination, static electricity |
You can rely on Henghao’s flexo solutions to help you calibrate your ci flexo printing press for optimal results. Accurate machine calibration ensures your flexo printing machine delivers high-quality prints every time.
You need to follow a careful process to start your flexo printing machine and achieve high-quality prints. Begin by cleaning and calibrating your ci flexo printing press. Remove leftover ink and dust to prevent smudging or misalignment. Next, install key components:
Select the right anilox rollers. Use 500–700 LPI for fine details or 200–400 LPI for solid colors.
Set plate cylinders with precision. This step reduces misalignment and ensures accurate flexographic printing.
Adjust tension control. Keep even pressure on the substrate to avoid wrinkles or registration errors. Automatic tension control works best for thin films and flexible materials.
Choose and load the correct inks. Water-based inks suit food packaging. UV inks dry quickly and give a glossy finish. Solvent-based inks offer weather resistance.
Perform initial quality checks. Monitor ink transfer through anilox rollers, plates, and doctor blades. Make sure doctor blades are set correctly and replaced as needed.
Check registration accuracy and ink flow.
Maintain ink viscosity and pH within recommended ranges. This step ensures color consistency and reduces print defects.
Balance print speed with drying methods. Use UV or hot air to prevent smudging or ink buildup.
Inspect and maintain critical parts like doctor blades and anilox rollers during startup and production.
Tip: Always document your settings and adjustments. This practice helps you repeat successful setups and complete the print run efficiently.
You must monitor print quality throughout the flexographic printing process. Start by conducting flexo press fingerprinting. This step gives you baseline data for dot gain, text clarity, and line sharpness. Create a dot gain compensation curve to keep print quality consistent. Run banded anilox trials with clean anilox rolls, new doctor blades, and fresh sticky back. Test at actual production speed for realistic results.
Real-time monitoring systems play a key role in modern flexo printing. Camera-based automatic impression and register systems adjust print parameters as you run the ci flexo printing press. These systems reduce operator error and waste. Automated ink-dispensing systems keep ink volume and formulation precise, which helps maintain color accuracy and reduces downtime. Tension monitoring devices use sensors to measure and control substrate tension. This control prevents tearing, misalignment, and poor print quality, especially at high speeds.
Tension monitoring devices use load cells, dancer rolls, or ultrasonic sensors.
Consistent tension control ensures continuous, efficient production and high-quality prints.
Cloud-based IoT dashboards let you track machine performance and make proactive adjustments.
Verifying ink and substrate compatibility is also important. Test different ink formulations to confirm proper adhesion and prevent bleeding or smudging. This step helps you maintain high-quality prints and complete the print run with fewer defects.
You need to select colors carefully for every multi-color flexo job. Accurate color selection ensures your prints match customer expectations and industry standards. In modern ci flexo printing, you use scientific tools and standards to control color. This approach helps you achieve consistent results across different print runs.
Adopt industry color standards like FTA FIRST, ISO 12647-6, or GRACoL 2013. These standards help you maintain stable and predictable print conditions.
Use spectrophotometers to measure color precisely. These devices check CIE Lab values and Delta E tolerances, so you do not rely only on your eyes.
Run to quantifiable color metrics, such as density, tone value increase (TVI), and hue angle. Agree on color tolerances with your customers before starting production.
Take periodic color measurements during the print run. This practice helps you catch color shifts early and avoid costly remakes.
Employ inline color measurement systems. These systems measure color bars automatically while the ci press runs, so you do not slow down production.
Choose inline systems based on speed, accuracy, price, and software features. Good systems guide you with clear adjustments for ink density or reformulation.
Meet brand requirements for tight color tolerances and short runs by using these controls.
Tip: Regular color checks and scientific controls help you deliver reliable results for every flexo job.
You often face registration challenges in ci flexo printing, especially with multi-color jobs. Trapping and overprinting techniques help you prevent visible gaps and color shifts when colors do not align perfectly. Trapping means you create small overlaps between adjacent colors. You usually spread the lighter color into the darker one, or choke the lighter ink to avoid unwanted edges. This overlap hides minor misregistration and keeps your design looking sharp.
Designers use hold lines—outlines in a single process color—around complex color areas. These lines reduce the visual impact of misregistration. Black strokes or keylines around text also help. When you set these strokes to overprint, they cover any gaps or color bleeding if the ci press shifts. Overprinting lets one color print over another, so you avoid knockouts that could cause white gaps.
You can see common color and registration issues in the table below:
Issue | Appearance/Description | Most Likely Causes | How to Fix |
|---|---|---|---|
Misregistration | Colors shift, cracks, or blur | Plate position, cylinder, tension, mechanical faults | Align plates, maintain press, control tension |
Ghosting | Faint repeated images, more in dark colors | Anilox cell filling, ink transfer | Optimize anilox, balance surface tension, adjust ink |
Mottled Image | Uneven density, shade variations, bumpy texture | Poor ink transfer, wrong anilox, contamination | Clean elements, adjust ink and substrate |
You improve print quality and reduce waste when you use trapping and overprinting in your ci flexo process. These methods help you maintain the visual integrity of your prints, even if the press is slightly out of register.
You need to keep every part of your flexo printing machine clean to ensure consistent performance and long equipment life. Cleaning and maintenance routines help you avoid ink buildup, mechanical failures, and print defects. Follow these steps for effective component cleaning:
Clean anilox rollers using methods like soda blasting, poly beads, ultrasonic cleaning, or gentle chemical solutions. Always use soft brushes and avoid harsh chemicals that can damage the rollers.
Wash print sleeves, plates, and cylinders right after use. Choose cleaning solutions based on the ink type—mild soap and water for water-based inks, or approved solvents for UV and oil-based inks.
Let all cleaned parts air dry before storage. Do not use compressed air, as it can introduce contaminants.
Store sleeves upright on cushioned surfaces and keep plates in a controlled environment with low humidity and away from ozone sources.
Handle cylinders carefully to prevent imbalance and mechanical issues.
Tip: Clean the entire press area, including the CI drum and backup rolls, to prevent ink residue and dust from affecting print quality.
Henghao offers training and support to help you master proper cleaning and maintenance techniques, ensuring your machine operates at its best.
You should perform regular checks to keep your flexo printing machine running smoothly. Scheduled maintenance and cleaning reduce downtime and repair costs while improving print quality. Here is a simple maintenance schedule:
Maintenance Interval | Recommended Tasks |
|---|---|
Daily | Inspect belts, guides, and ejectors; clean dust and ink; check alignment. |
Weekly | Lubricate moving parts; inspect sensors; tighten fasteners. |
Monthly | Check wear components; calibrate accuracy; test ejecting system. |
Quarterly | Deep clean units; inspect drive and motor; update maintenance logs. |
You should also train operators on proper start-up, shutdown, and material handling. Proactive cleaning and maintenance, such as daily cleaning of anilox rollers and scheduled inspections, extend the operational lifespan of your equipment. With the right care, high-end flexo printers can last over a decade. Henghao provides expert guidance and support, helping you set up a maintenance and cleaning plan tailored to your needs.
You have learned how to set up a flexo printing machine by following a clear step-by-step guide. Each stage, from substrate cleaning to machine calibration, helps you achieve reliable and high-quality prints. When you use best practices for setting up, you reduce errors and improve efficiency.
Print defects can happen during flexographic printing. You need to identify and fix these problems quickly. Here are common troubleshooting steps:
Define the print defect, such as pinholing, streaking, or feathering. Note where it appears and how often.
Compare the defective print to a standard sample to see the difference.
Check simple factors first. Look at ink viscosity, plate cleanliness, substrate type, and doctor blade condition.
Isolate the problem by checking if the defect repeats in a pattern. This helps you find if the issue comes from the plate, anilox roll, or is random.
Inspect and adjust press settings. Focus on anilox-to-plate pressure, plate-to-substrate impression, drying, and web tension.
Change only one setting at a time. This lets you see which adjustment fixes the problem.
Write down the defect, cause, and solution. Build a record for future troubleshooting.
Tip: Regular cleaning and operator training help prevent many common defects.
Here is a table showing quick fixes for frequent print defects:
Defect | Quick Fixes |
|---|---|
Pinholing | Lower ink viscosity, clean anilox, adjust dryer |
Streaking | Check doctor blade, clean ink chamber, inspect anilox |
Feathering | Reduce pressure, increase ink viscosity, adjust plate specs |
You can achieve consistent results by using best practices for setting up your flexo printing machine:
Prepare the substrate by cleaning and aligning it. This prevents misalignment and distortion.
Mount printing plates securely. Use laser registration systems for precise alignment.
Set ink parameters, including viscosity and color, according to manufacturer guidelines.
Adjust impression pressure carefully. This protects plates and ensures uniform print quality.
Monitor print quality and machine settings. Use tools like densitometers for color accuracy.
Clean and maintain plates, anilox rolls, and machine parts regularly.
Train operators to handle the machine safely and efficiently.
Note: Automation and standardization help you reduce setup times and keep print quality high.
When you follow these best practices for setting up, you improve print consistency and reduce downtime. You also extend the life of your equipment and get better economic returns.
Precision and regular maintenance keep your flexographic printing results consistent and your equipment running smoothly. Daily checks, cleaning, and careful plate handling prevent costly breakdowns and poor print quality. When you follow a step-by-step guide, you improve efficiency and reduce errors. Henghao supports you with expert training, global service, and advanced solutions.
Prepare your machine, align plates, calibrate settings, and inspect prints.
Clean and maintain equipment after every job.
Apply these best practices to achieve reliable flexographic printing and long-term success.
You should clean your flexo printing machine after every print run. Regular cleaning prevents ink buildup and keeps your prints sharp. Daily cleaning of rollers and plates helps you avoid defects.
You should use automated mounting systems and check registration marks before starting the press. Accurate plate registration helps you avoid blurry images and wasted material.
Yes, you can use flexo printing for many types of packaging. This process works well for flexible films, labels, cartons, and paper bags. You get reliable results with the right setup.
You should identify the defect, compare it to a standard sample, and check ink viscosity, plate cleanliness, and tension. Adjust one setting at a time and record your solutions for future reference.
Machine calibration helps you control impression pressure and tension. You get consistent print quality and reduce waste. Regular calibration keeps your flexo printing machine running smoothly.
Tip: Always document your troubleshooting steps. This practice helps you solve problems faster next time.


